This website uses cookies to ensure you get the best experience on our website. Learn more
Setting up BitLocker for Windows 10
What is Bitlocker?
BitLocker Drive Encryption, which is commonly referred to simply as BitLocker, allows Windows users to encrypt hard drives in an effort to keep data secure. BitLocker has been a part of the Windows operating system for many years, but Microsoft greatly enhanced BitLocker in Windows 10 version 1511, by introducing new encryption algorithms and making it possible to configure group policy settings separately for fixed data drives, removable data drives, and operating system drives.
BitLocker can optionally use the computer’s TPM, but in most cases the TPM will need to be prepared ahead of time. After enabling the TPM at the firmware level (if necessary), boot the computer into Windows and then log in. Now, right-click on the Windows Start button and then enter the Control command at the Windows Run prompt. This will open the legacy Control Panel. Enter TPM in the Control Panel’s search box to access the Trusted Platform Module (TPM) Management console. When this console opens, look at the Status section to see if the TPM has already been prepared, as shown in Figure 1. If not, then click on the Prepare the TPM link and follow the prompts to get the TPM ready for use. Remember, using the TPM is optional.
Figure 1:
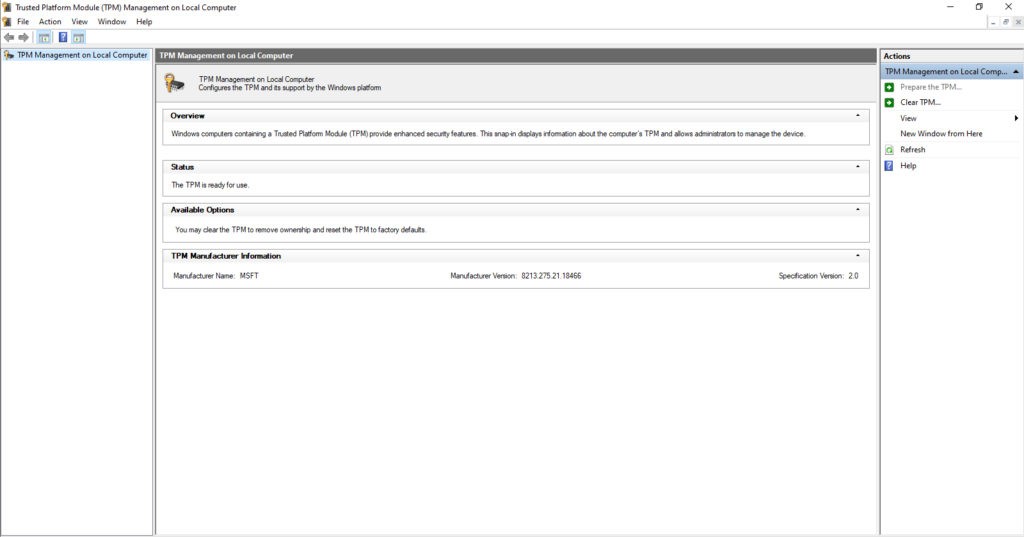
If you want to use the computer’s TPM, you may need to prepare it for use.
Enabling BitLocker encryption for a hard disk on a Windows 10 computer is a relatively easy process. To encrypt a disk, right-click on the disk and then choose the Turn on BitLocker option from the resulting shortcut menu. This will cause Windows to open the BitLocker Drive Encryption dialog box, which you can see in Figure 2.
Figure 2:
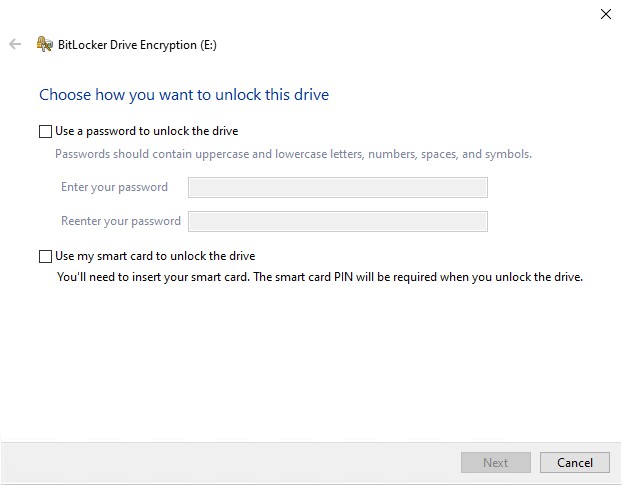
The BitLocker Drive Encryption Dialog box is used to enable BitLocker.
As you can see in the figure above, you are required to choose the mechanism that will be used to unlock your BitLocker encrypted drive. You can unlock the drive using a password and / or a smartcard (which requires a PIN).
Once you have chosen an authentication method, you are taken to the screen shown in Figure 3, where you are prompted to back up your recovery key. The recovery key is a mechanism for regaining access to the BitLocker encrypted drive in the event that the password is forgotten or the smartcard is lost or damaged. You can save the recovery key to a file, to a USB flash drive (the USB flash drive option is not displayed if you are encrypting the system disk), or to your Microsoft account. You also have the option of printing the recovery key. It is worth noting that you can use multiple recovery key protection methods if you like. You are free to keep selecting recovery methods until you click Next.
Figure 3:
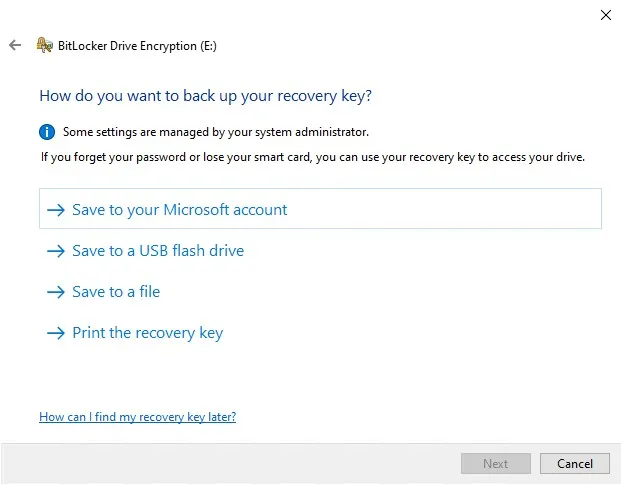
You must choose how you wish to protect your recovery key.
The next screen, which is shown in Figure 4, prompts you to choose whether you wish to encrypt the entire disk, or only the disk space that is already in use. Encrypting the entire disk tends to be a slow process, even when solid state storage is in use. Even so, Microsoft recommends choosing the full disk encryption method if the disk already contains data. Encrypting only the disk space that has been used tends to be a faster process, but Microsoft only recommends choosing this option if you are encrypting a brand new disk.
Figure 4:
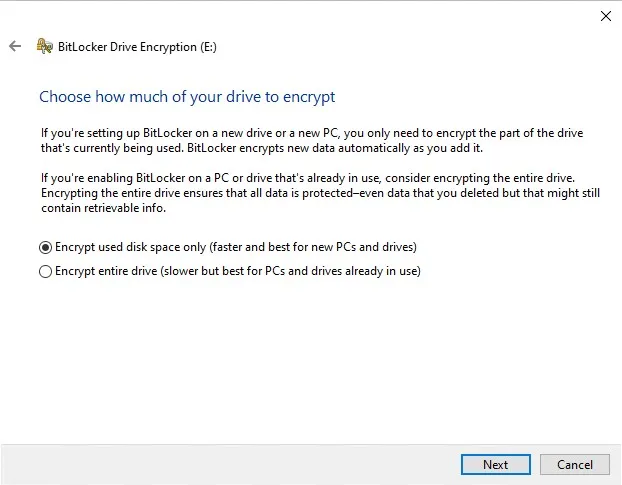
Choose whether you want to encrypt the entire disk, or just the portion that has been used.
If you are using Windows 10 version 1511 or higher, then clicking Next will take you to a screen asking you if you would like to use a new encryption mode called XTS-AES. You can see what this screen looks like in Figure 5. You should choose this new encryption mode if the disk that is being encrypted is internal to the PC, or if it is a removable disk that will only be used on machines that are running newer Windows builds. Otherwise, it’s best to use Compatible mode.
Figure 5:
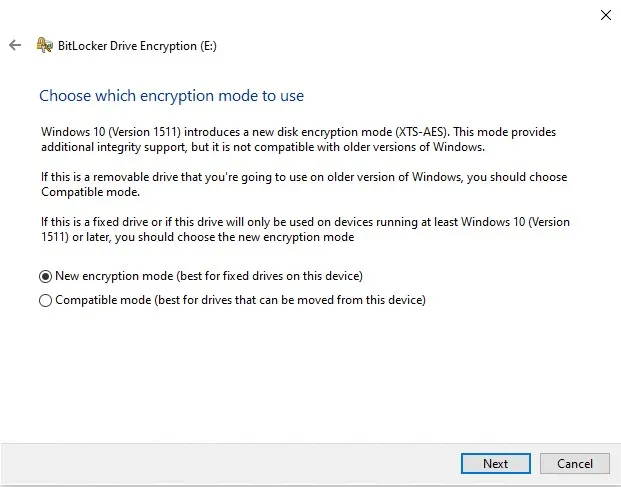
Choose the encryption mode that you want to use.
Click Next, and Windows will ask you if you are ready to encrypt the drive. Click the Start Encrypting button to begin the encryption process. When the process completes, you will see a message like the one shown in Figure 6, indicating that the disk has been encrypted.
Figure 6:
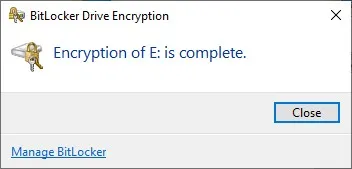
Windows will let you know when the disk has been encrypted.
BitLocker Recovery Mode
There are any number of circumstances that can lead to a user being locked out of a BitLocker encrypted drive. Some of these lockout triggers involve simple things like a user forgetting their PIN or entering their PIN incorrectly too many times. One of the lesser understood contributing factors however is modifications to the Platform Configuration Registers (PCRs).
The PCRs instruct the machine’s CPU chip to check the system’s integrity during the boot process as a way of making sure that the system has not been tampered with. If these integrity checks are successful, then the TPM chip releases the BitLocker keys and the system boots normally. The problem with this is that low level actions, such as choosing to boot from a different hard disk can result in the system believing that tampering has occurred, and the system refusing to release the BitLocker keys.
Because there are so many lock out triggers that can cause a system to enter BitLocker recovery mode, it is important for organizations to have a self-service encryption key recovery solution that users can use to unlock their devices without having to contact the helpdesk (especially since MBAM is no longer available). Given the highly sensitive nature of BitLocker keys, it is critical for such a solution to include a multi-factor authentication mechanism that requires the user to do more than just answer a question. Challenge / response-based authentication systems can be easy to fool, and may actually become a point of vulnerability for the organization.
(Last updated on October 30, 2023)
Related Articles
-
What causes BitLocker Recovery Mode?
This blog will look at the root causes of BitLocker Recovery Mode, and how you can mitigate its impact on the helpdesk with self-service key recovery.
Read More -
Self-service encryption key recovery for BitLocker
Stockholm, June 19, 2019 – Specops Software announced today a new release of Specops Key Recovery. The solution now provides self-service key recovery for devices encrypted with BitLocker. This allows users to unlock their devices with multi-factor authentication, without calling the helpdesk. “BitLocker is used by the majority of organizations running on Windows” said Lori…
Read More

