Windows 11 22H2 capture image deployment gets stuck on “Getting ready”.
Note: This issue only occurs when deploying older Windows 11 22H2 builds. The bug has been solved In Windows 11 version 22H2.6.
Symptom
After a successful capture of my reference machine I do as I’ve always done and import my new capture image to Specops Deploy OS and choose the new image in my Specops OS Deploy group policy. I PXE boot a computer to get this new image deployed but after the first reboot the computer is stuck forever in the “Getting Ready” stage, and it will never move beyond that. The new capture image deployed to another pc obviously has the same problem and after the first reboot it’s also stuck on “Getting Ready”.
Cause
The reason for this error message is a bug in Windows 11 that appeared in the 22H2 version. The problem occurs within the sysprep stage and affects a reference PC that has been domain joined. The bug has been fixed in Windows 11 version 22H2.6. We highly recommend to use the latest build for your capture image so this issue can be avoided. If you don’t have access to a later build then this workaround can be used instead.
Workaround
To work around this, two lines need to be deleted from the file c:\Windows \System32\Sysprep\ActionFiles\Specialize.xml on the reference machine before capture.
The problem is that this file cannot be edited due to ownership and permissions on this file so we need to change owner and add the necessary permission to the file.
Step 1
Create a powershell script .ps1 and paste the following lines to it:
$FilePath = "$($env:windir)\System32\Sysprep\ActionFiles\Specialize.xml"
$NewAcl = Get-Acl -Path "$FilePath"

# Set properties
$identity = New-Object System.Security.Principal.NTAccount("Builtin", "Administrators")
#$identity = "BUILTIN\Administrators"
$fileSystemRights = "FullControl"
$type = "Allow"

# Create new rule
$fileSystemAccessRuleArgumentList = $identity, $fileSystemRights, $type
$fileSystemAccessRule = New-Object -TypeName System.Security.AccessControl.FileSystemAccessRule -ArgumentList $fileSystemAccessRuleArgumentList

# Apply new rule
$NewAcl.SetOwner($identity)
$NewAcl.SetAccessRule($fileSystemAccessRule)
Set-Acl -Path $FilePath -AclObject $NewAcl

# Make changes in Specialize.xml
[xml]$xml = Get-Content $FilePath
$xml.SelectNodes("//sysprepModule[@methodName='CryptoSysPrep_Specialize']") | % { $_.ParentNode.RemoveChild($_) }
$xml.Save($FilePath)
This script will take ownership of the Specialize.xml file and add full control permissions for the local Administrators group, after this the last part of the script will search the .xml file for CryptoSysPrep_Specialize lines (which causes the clients to get stuck on “Getting Ready”), delete them, and then save the file.
Save the .ps1 script in your DeploymentRepository in the OS Deploy file system i.e.
E:\Specops\Deploy\DeploymentRepository\Scripts\Misc\Win11\Set-ACL-Sysprep.ps1
The Misc and Win11 folders are created by me just to keep it a bit more structured.
Step 2
Open the MDT Deployment Workbench and go to Task Sequences.
This should be done in the Deployment share that is pointing to the DeploymentRepository, if it’s not visible you need to open it
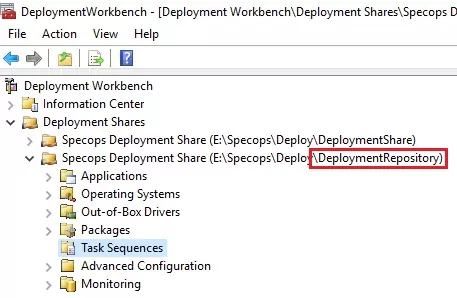
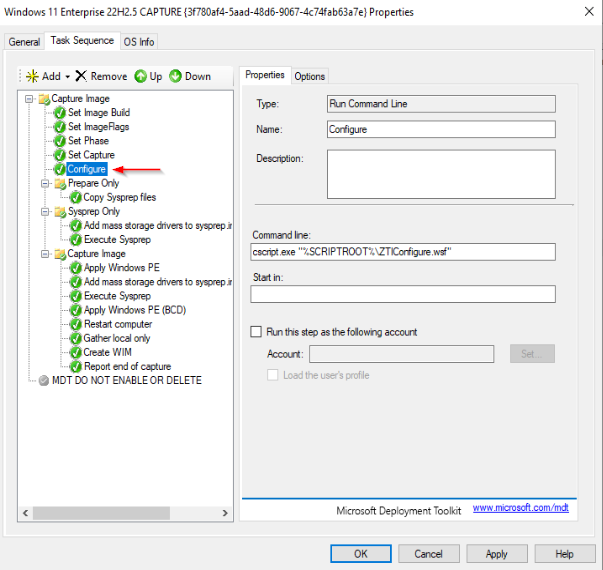
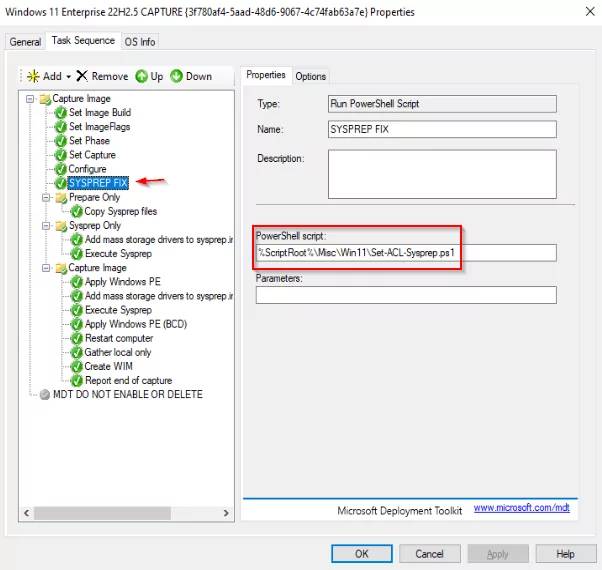
Right click on the CAPTURE task sequence for your Windows 11 image and click Properties
Go to the Task sequence tab and highlight the Configure task, it is right after this task that we want to add our script.
Click Add – General – Run PowerShell Script
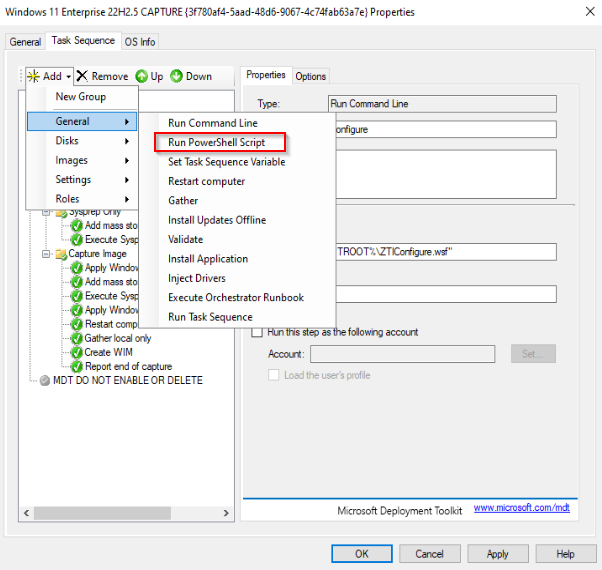
Give the new task a name and point to the powershell script we created in step 1. In my example %ScriptRoot%\Misc\Win11\Set-ACL-Sysprep.ps1.
%ScriptRoot% is a useful variable pointing to the Scripts folder in the DeploymentRepository where we saved the script.
Step 3
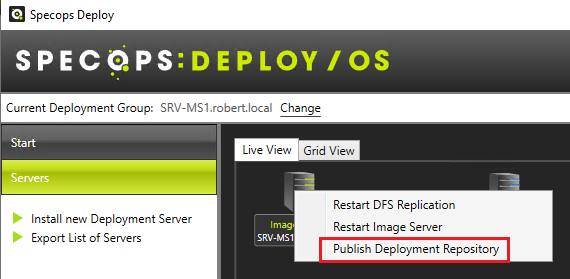
Click Apply to save your changes, close the Deployment Workbench and open Specops OS Deploy Admin Tools. Because we did changes behind the scene in MDT, Specops OS Deploy have no idea that any changes has been made, so in order for your Deployment Server(s) to receive this change we need to publish these changes from the Image server to the Deployment server(s). In order to do this, right click on your Image server and click Publish Repository.
Happy Deployments!