Specops Authentication Configuration Hardening Guide
Specops Authentication services (uReset, Secure Service Desk, Key Recovery) run on public cloud infrastructure and by default are accessible from anywhere on the internet. We offer several features that can enable admins to restrict access to certain features of the application in order to minimize the attack surface for brute force or passwords spray attacks targeted at your customer account.
Table of contents
Protecting Windows Identity
Specops Authentication contains a number of features to prevent a bad actor from using a password field on our platform as an attack surface for a password spray or brute force attack.
Admin and Service Desk Authentication Policies
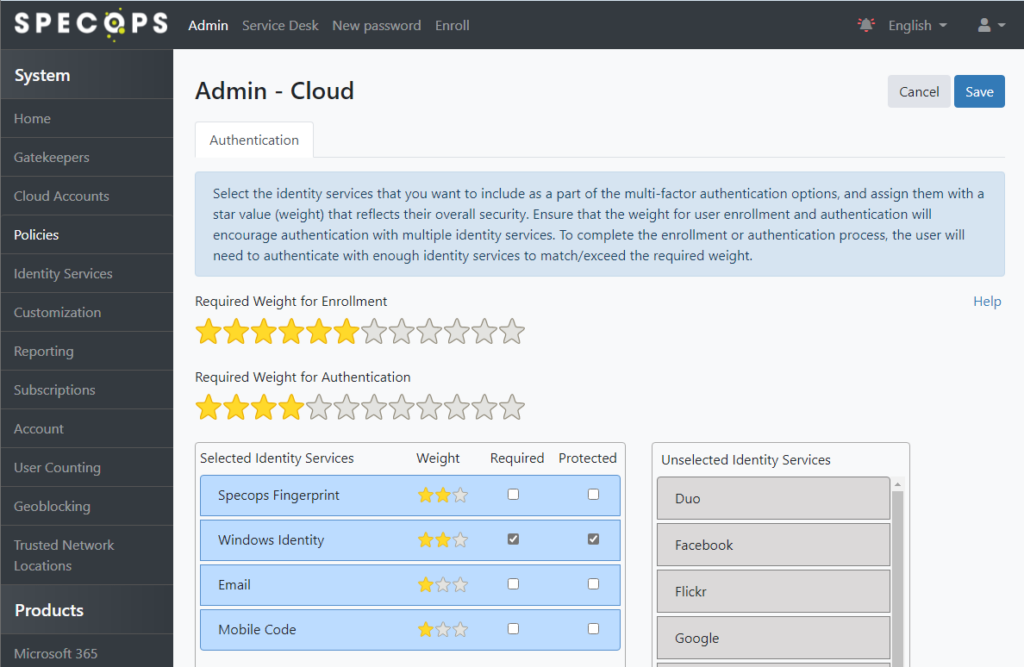
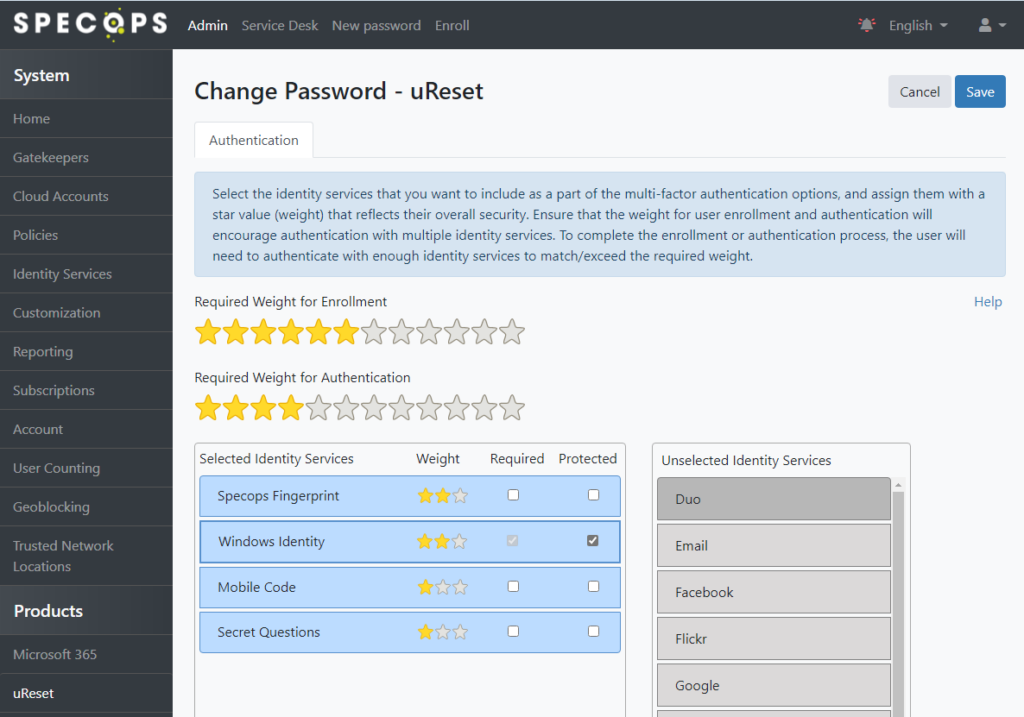
For access to the admin and service desk areas, we recommend a policy that requires multiple factors including Windows Identity and setting the Windows Identity to be both required and protected. A protected identity service cannot be attempted before a non-protected identity service is authenticated successfully; this limits access to the password entry field to sessions that are at least partially authenticated by one other identity service.
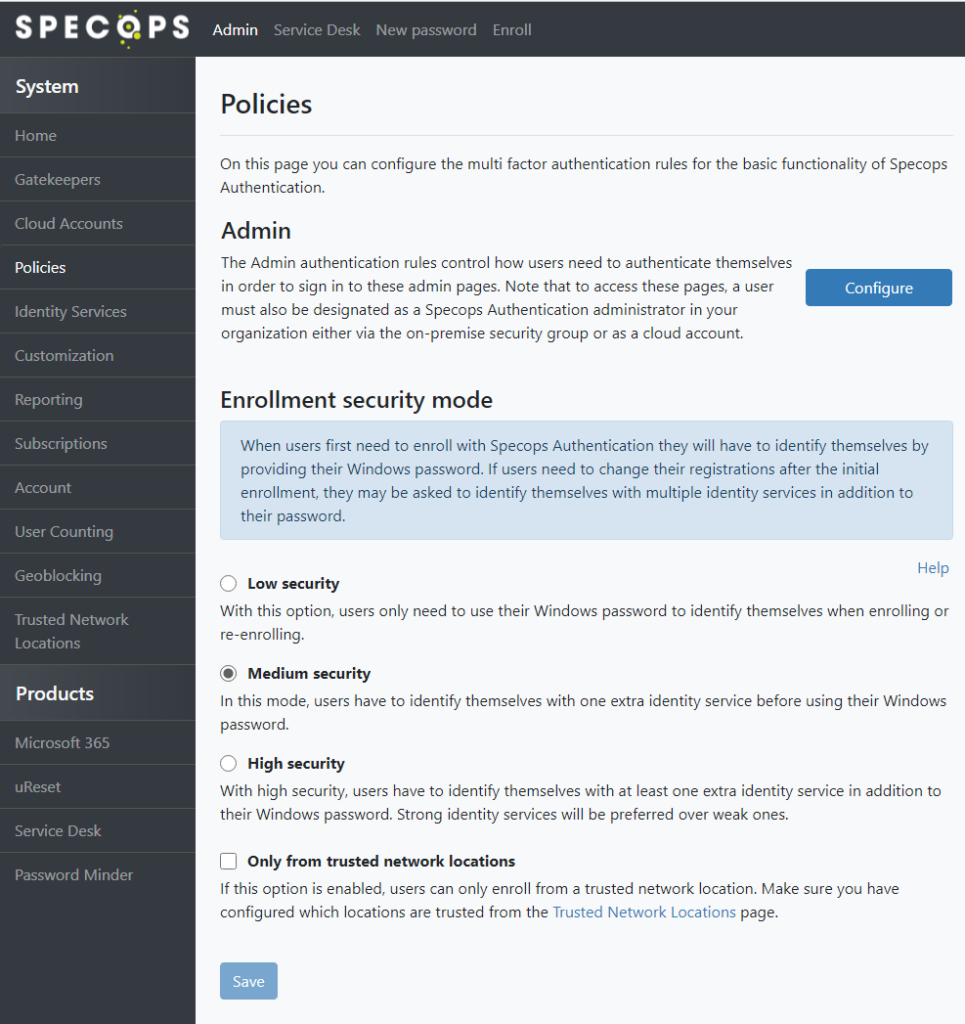
To configure the admin policy, log into the Admin Web and navigate to Policies, then click ‘Configure’ under Admin:

Set the star bars and additional identity services as desired, then click Save in the top right:
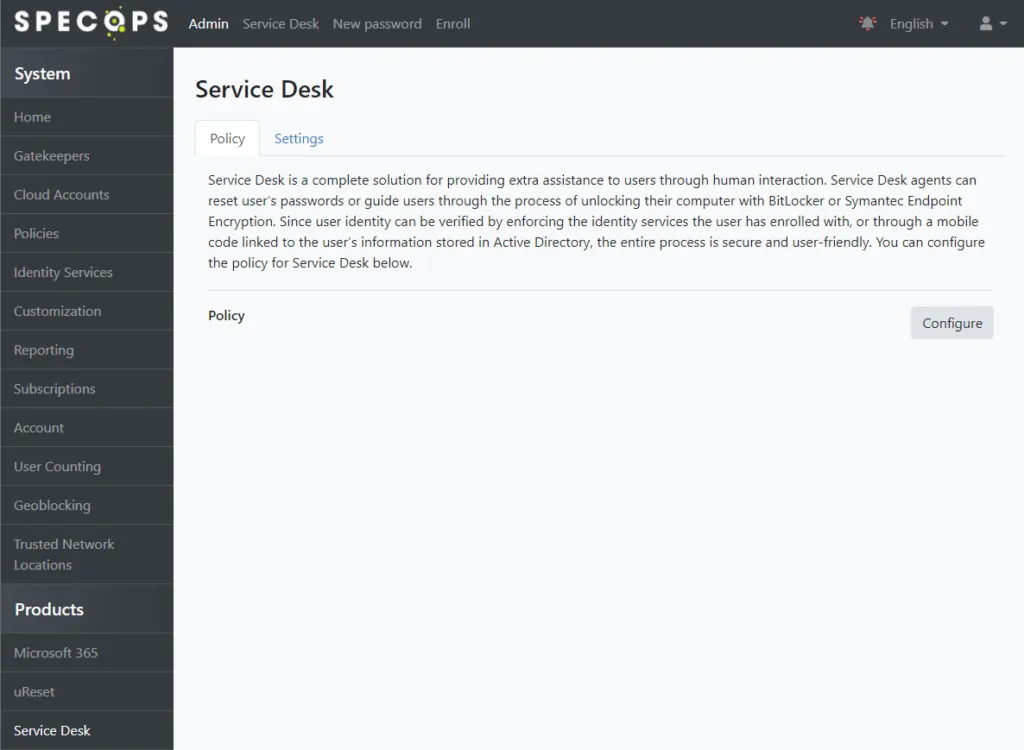
The Service Desk policy should be configured simlary. Navigate to Service Desk under Products on the left-hand side, then click ‘Configure’:
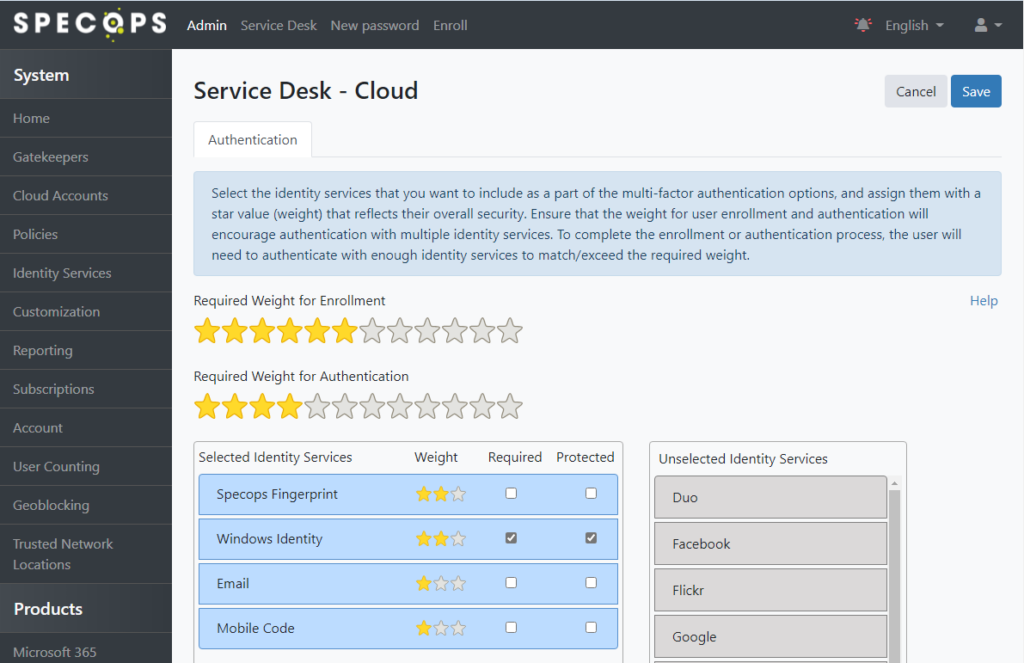
Set a policy similar or identical to the one used for Admin then click Save:
Enrollment Policy
Ensure the Enrollment security mode is set to Medium or High security. Both policy modes will require some form of multi-factor authentication for users who are already enrolled, with the Windows Identity protected by default.
Users who are not enrolled in any identity service will still be able to enroll with only their Windows password; consider requiring Trusted Network Location for Enrollment as an additional layer of security (details on that provided later in this article).
Additional information on the Enrollment security mode can be found under the Policies section in the admin guide here: https://specopssoft.com/support/ureset-8/authentication-web.htm
uReset Change Password
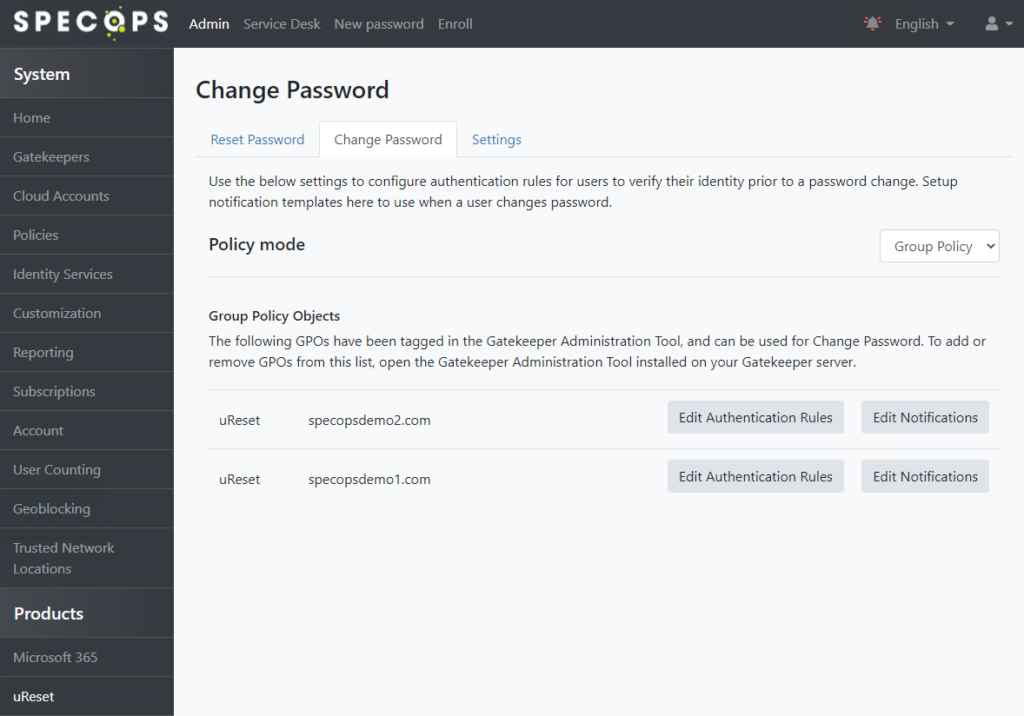
uReset customers should also mark Windows Identity as Protected in any Change Password policies. Navigate to uReset under Products, go to the Change Password tab, and click to Edit Authentication Rules on each policy listed there accordingly:
Note for Change Password the Windows Identity service is marked as Required by default. As with the admin and service desk policies, ensure multifactor options are configured here and mark Windows Identity as Protected:
Additional Specops Products
Customers using Specops Authentication for Microsoft 365 or Specops Key Recovery should also ensure that the policies for those products require multi-factor and have Windows Identity marked as protected.
Geoblocking
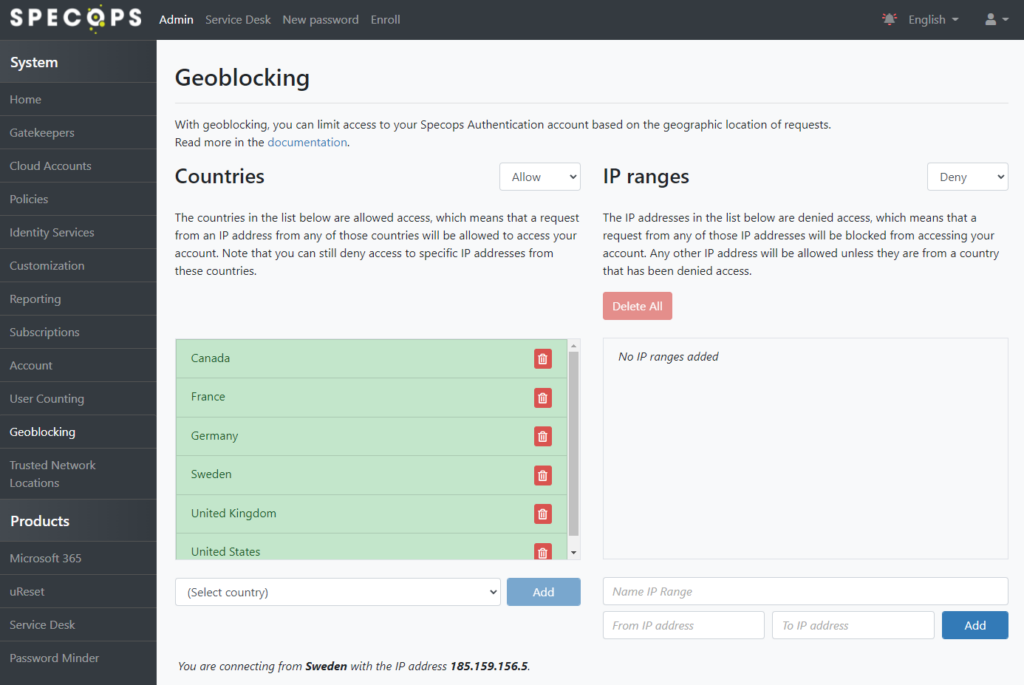
Specops Authentication supports restricting access based on country location using IP Geolocation data. If your business model permits it, consider restricting access by either using an Allow list of countries where staff are located or a Deny list to block specific countries. An example configuration is shown below. With this configuration, your Specops Authentication customer account is inaccessible from IPs that are not located in one of the countries listed. The IP ranges section here may be used for additional exceptions to the geolocation data as needed:
Trusted Network Locations
Trusted Network Locations allows admins to restrict access to specific areas of Specops Authentication based on the public IP address of the end user. This provides a method to ensure access to potentially sensitive areas of the application are restricted to users coming from known IP addresses belonging to company office and/or data center locations.
If users are connecting primarily from home or other remote locations, consider if traffic to Specops Authentication can be backhauled via a VPN or web proxy. If traffic to the URLs/hosts listed here is routed back to your corporate network through a VPN, it will appear to us as if it is coming from that corporate office IP address when it reaches the Specops Authentication servers.
Begin by populating the list of IPs to trust in the Admin Web:
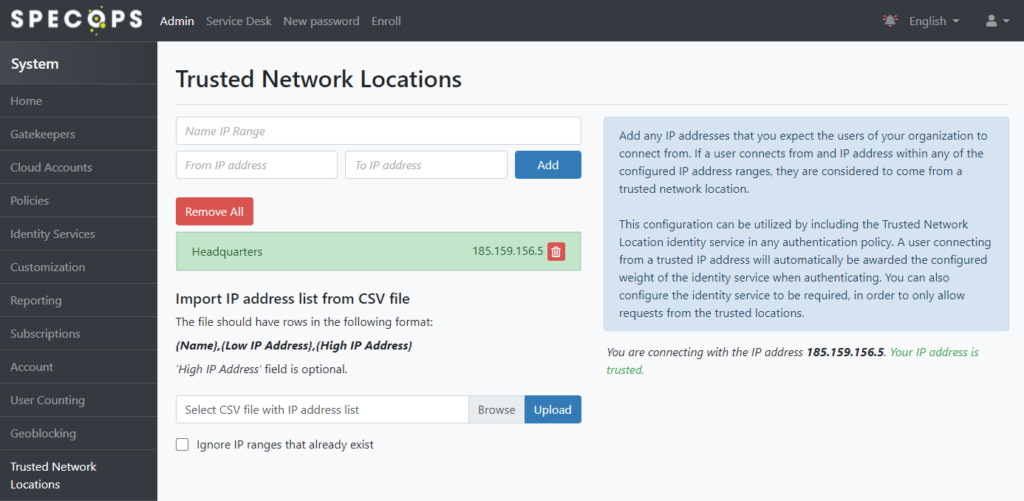
Once the list is populated, we can go back to any multi-factor policy and require trusted network location by adding it as an ID service and marking it as required. For example:

Note the user will earn the stars for Trusted Network Location when connecting from a trusted IP; ensure the number of stars required for authentication is adjusted accordingly for your desired MFA policy.
Specops recommends requiring Trusted Network Location to protect sensitive areas of the product such as the Admin and Service Desk policies.
Enrollment can also be set to “Only from trusted network locations” — this would require both enrolled and unenrolled users connect from a trusted network location in order to complete/edit their self-enrollment.

Captcha
Specops Authentication supports requiring CAPTCHA protection to all pages. We use Google reCAPTCHA technology for this purpose.
Administrators can enable Captcha always, or only for users coming from untrusted network locations (if the Trusted Network Locations feature is configured as described in the previous section):
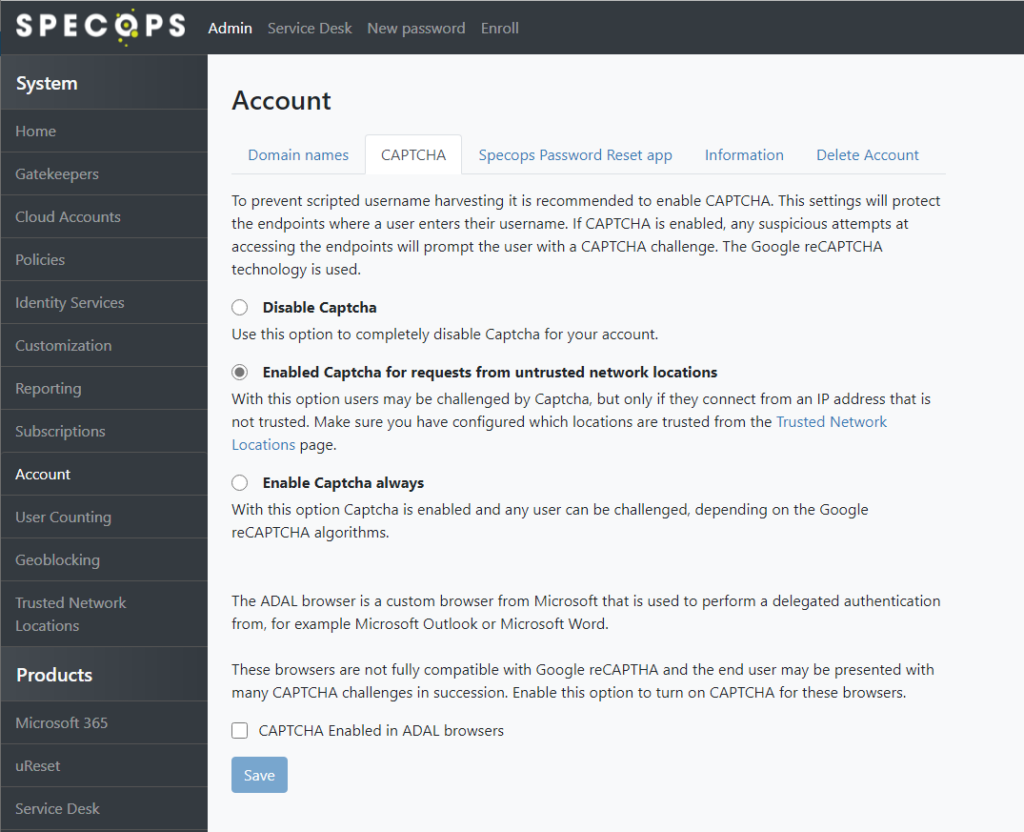
Domain Name Protection
The Domain Name Protection feature obfuscates the existence of your domain name on our servers. With this feature configured, your users can only access the product using special URLs which contain an obfuscated GUID.
Enable Domain Name Protection in the admin web under the Account tab:
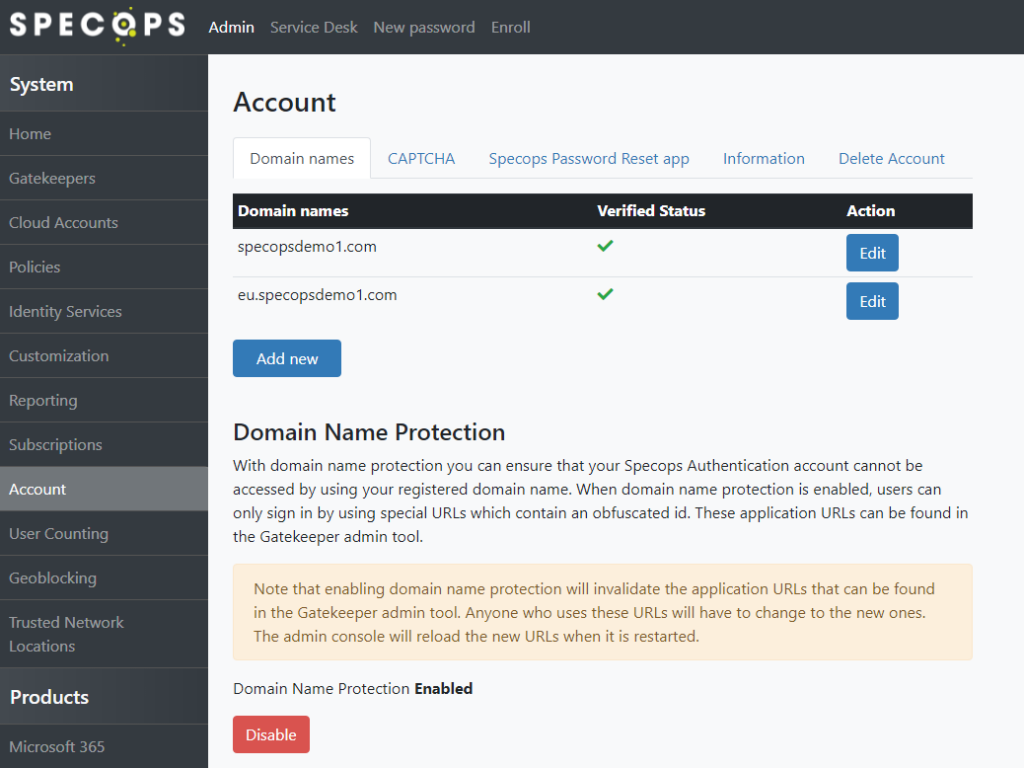
Once this feature is enabled, restart the Specops Authentication Gatekeeper Admin tools on your Gatekeeper server (note: this operation requires Domain Admin privileges). You will see all URLs now contain a customerId parameter, and this parameter is now required for any of your users to access the platform.
