
Replacing the Specops Password Reset Web Server Certificate
Specops Password Reset web runs within IIS, typically under the Default Web Site. Specops recommends using a certificate issued by a commercial or enterprise internal certificate authority to secure traffic to the web server, and if doing so, the administrator of that system should be able to provide guidance on how to create a certificate signing request (CSR) and then complete the request by importing the certificate into the computer personal certificate store.
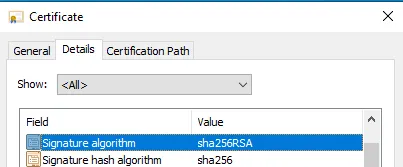
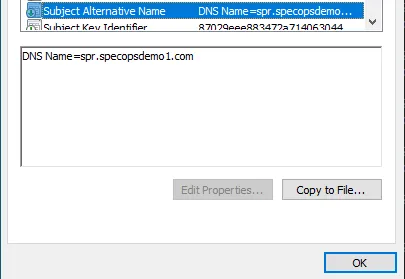
The certificate should have a valid date, a modern signature algorithm (e.g. sha256RSA), and both common name and Subject Alternative Names should specify the FQDN of the hostname used to reach the Password Reset web server (a valid hostname being either the server FQDN or a DNS alias). For example:

Self-Signed Certificates
While not recommended, a self-signed cert may be used as well. To create a self-signed certificate in PowerShell that meets the necessary requirements:
New-SelfSignedCertificate -Subject <SERVER FQDN> -hashalgorithm sha256 -NotAfter (Get-Date).AddYears(5) -dnsname <SERVER FQDN> -FriendlyName "SPR Web Cert $(get-date)"
For example:
New-SelfSignedCertificate -Subject spr.specopsdemo1.com -hashalgorithm sha256 -NotAfter (Get-Date).AddYears(5) -dnsname spr.specopsdemo1.com -FriendlyName "SPR Web Cert spr.specopsdemo1.com $(get-date)"

Note: when using a self-signed certificate, you must import the certificate into the computer Trusted Root Certification Authorities Store.
Trusting a Self-Signed Certificate
Export the certificate from either the Certificates MMC, PowerShell, or IIS manager. Here we’ll use PowerShell — note we are using the same thumbprint displayed when the cert was created in the previous section.
Export-Certificate -Cert Cert:\localmachine\my\<CERT THUMBPRINT> -FilePath c:\self-signed.cer
Example:
Export-Certificate -Cert Cert:\localmachine\my\38107F076934C0E99F64C209D9CE662CA6A2A7DA -FilePath c:\self-signed.cer

See the following guide from Microsoft for how to deploy the certificate using Group Policy. Be sure to import the certificate to the Trusted Root Certification Authorities store: https://docs.microsoft.com/en-us/windows-server/identity/ad-fs/deployment/distribute-certificates-to-client-computers-by-using-group-policy
Update IIS Certificate Binding
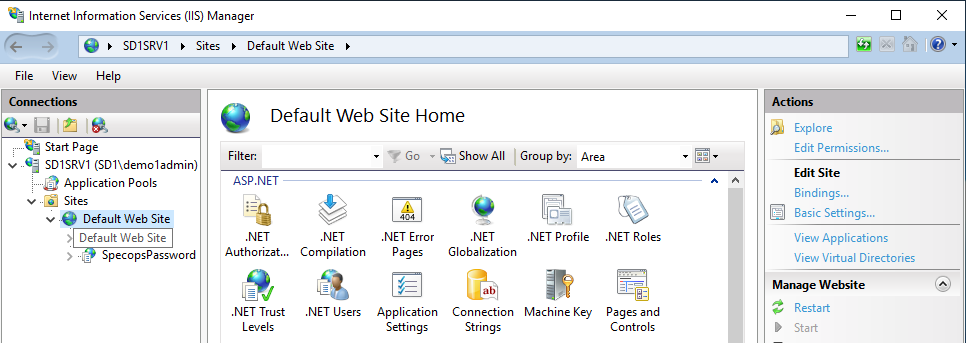
Open Internet Information Services (IIS) Manager from the Windows Administrative tools on your Password Reset web server.
Expand the tree on the left and select the Default Web Site. (If there are multiple sites, expand the tree further and select the one that has a SpecopsPassword application below it.
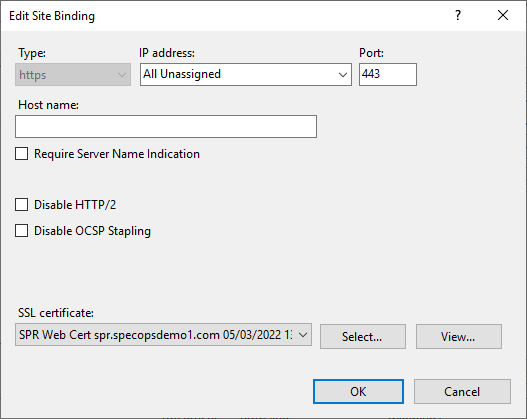
Choose Bindings… on the right-hand side. Highlight the https binding and click ‘Edit’
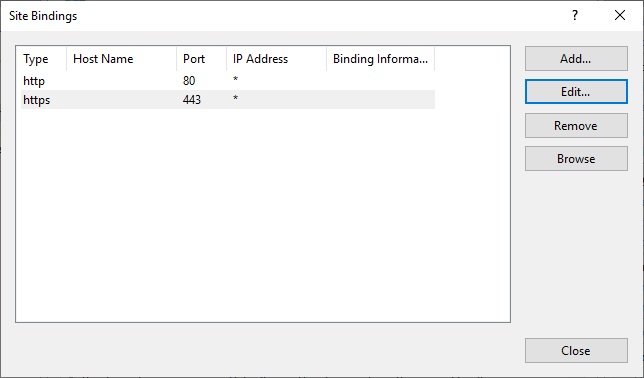
Change the binding to the desired certificate and click OK.
Test by going to the Password Reset page in a workstation browser and/or by launching the Reset Password link from the login screen on a machine with the Specops Authentication client installed. You should see the page load with no certificate warnings.
