
This website uses cookies to ensure you get the best experience on our website. Learn more
Maintain golden image: Keep your corporate golden image golden
Table of Contents

Last updated on May 9, 2025
Trying to maintain a golden image is a challenge many IT administrators struggle with. But it’s a necessity since updating the image with patches and settings means you shorten the time your users need to wait. There’s a tried and tested way to do this that is going to make your life much easier.
Many people use snapshots for their capture image which can result in errors being replicated in several generations of the image. The best practice is to always start with your volume license ISO to ensure you get a clean installation and that you are on the most recent patch level. However, this is a time consuming task. Imagine how great it would be if you could start installing the reference PC before you leave work at the end of the day and the next morning it’s installed, patched with all of the corporate settings and your golden image is just a few clicks away.
This step-by-step guide is going to simplify your imaging. It relies on having an Organizational Unit (OU) and letting Specops OS Deploy manage your capture images.
Step 1: Create an Organizational Unit
Create an OU in Active Directory called Capture and create sub level OUs for each OS you want to handle, i.e. W10x64.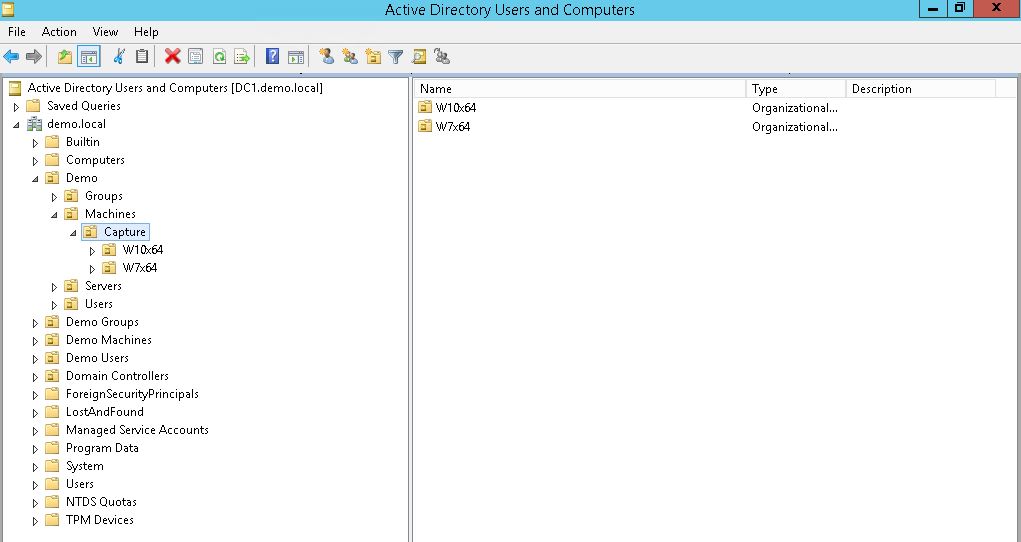 The idea is to pre-stage one computer into each OU you want to keep up-to-date. This computer account will remain in the OU even after your capture to make it easy to do the same process every time you want to build a new up-to-date image. Always use virtual machines as capture-PCs due to the minimum amount of drivers needed. Remember, you want to keep the golden image as neutral as possible.
Note: Captures on physical machines is not supported by Specops support. Neither Specops nor Microsoft recommend or support captures on any physical machines.
Use the hypervisor you prefer i.e. Hyper-V, Vmware or Virtual Box. Just remember to use virtual hardware that has native support in Windows, for example, you want to use the E1000 NIC in Vmware and not the VMXNET3 adapter. In Hyper-V you must use the Legacy NIC, this is to get PXE support and you should always deploy your capture-PC using PXE boot. Never install any integration tools such as Vmware Tools on your capture machine, you don’t want this software in your golden image.
Configure your virtual machine with a minimum of 2GB RAM, we recommend 4GB RAM.
Step 2: Create a group policy
Next you need to create a group policy with the settings needed for the capture process, and a few more settings that will generate a nice result. Remember to block inheritance to the capture OU to prevent unnecessary settings on your golden image. Once again, think neutral! 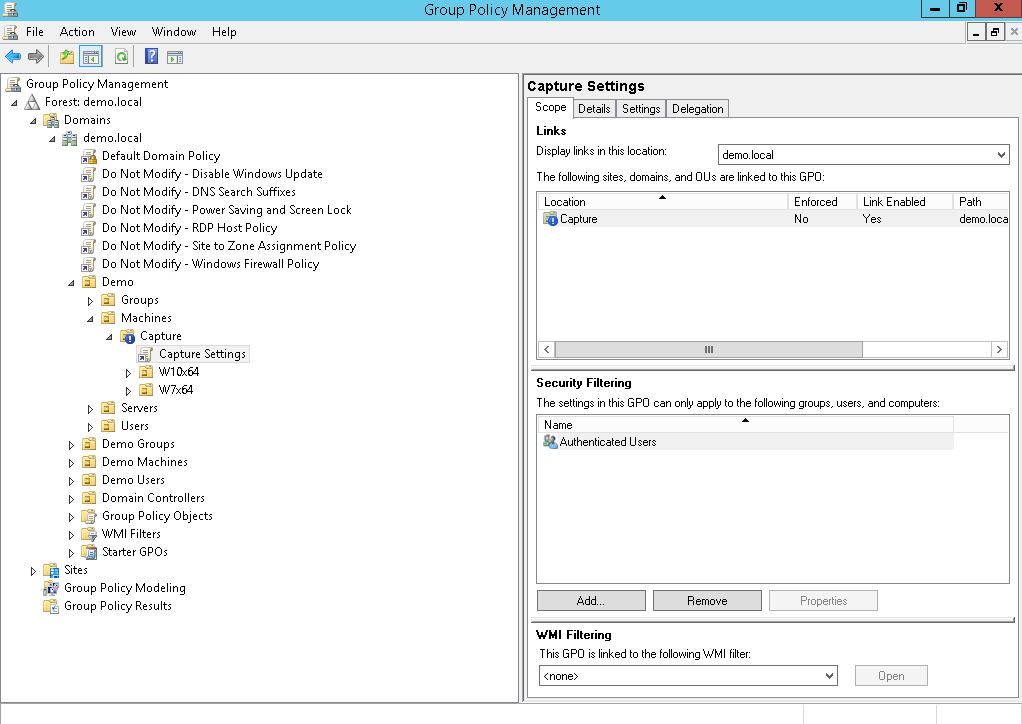 In this policy, make the following changes:
Open up Remote Registry. This is a system service used during the capture process to make Specops Deploy OS capture process logon automatically. The settings is located in:
Computer Configuration / Policies / Windows Settings / Security Settings / System Services
Remote Registry
Set to Automatic
Step 3: Tweak the settings
Next, we need to open up some Windows Firewall ports. Remote Service Management (RPC) and Windows Management Instrumentation (WMI). Specops Deploy OS uses this ports during the capture process to trigger automated tasks in process.
The settings are found here:
Computer Configuration / Policies / Windows Settings / Security Settings / Windows Firewall with Advanced Security
Inbound rules for allowing Remote Service Management and Windows Management Instrumentation
It is always nice to be able to ping your clients out there and Specops Deploy OS sends out an echo request to make sure the client you are going to capture is alive and kickin’ so let’s open up for this as well.
Computer Configuration / Policies / Administrative Templates / Network / Network Connections / Windows Firewall / Domain Profile
Windows Firewall: Allow ICMP exceptions
Enabled – Allow inbound echo request
Sometimes Windows Defender can cause sysprep to fail so I think it´s a great idea to turn it off for computers in the Capture OU.
Computer Configuration / Policies / Administrative Templates / Windows Components / Windows Defender
Turn of Windows Defender Antivirus
Enabled
Step 4: Show the user what’s going on
Almost done. There are a few more settings I think are very nice to have in a controlled and standardized environment. Windows 7 and above is designed to give you the look and feel of an operating system startup as quickly as possible. Unfortunately, this results in that the logon screen shows before the network is started and therefor the group policy processing will end before anything happens. This is a common scenario when the client is equipped with SSD drives. Make the following settings to prevent this from happening.
Computer Configuration / Policies / Administrative Templates / System / Group Policy
Configure Group Policy Caching
Disabled
Computer Configuration / Policies / Administrative Templates / System / Logon
Always wait for the network at computer startup and logon
Enabled
Another very nice feature is to have Windows show the group policy processing to the end-user, with this setting enabled the user will see what is happening instead of the message “Please wait” before the logon screen appears.
Computer Configuration / Policies / Administrative Templates / System
Display highly detailed status messages
Enabled
With this policy in place it’s time to move on to the next step.
Step 5: Create the installation policies
Create one Specops Deploy OS installation policy for each Windows version you want to make a golden image of and link it to its own OU like in the screenshot below. Name your policies accordingly.

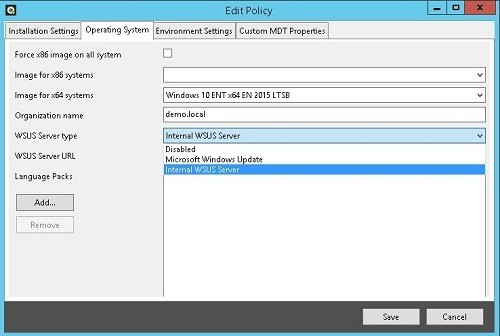
Step 6: Edit the policies
Edit each policy and remember to use the imported original Windows media as install image. Why use the original media instead of my last upgraded image? Because the capture process is going to be fully automated and it will not waste your valuable time. You also want the newly created images to be as up-to-date as possible and just have the hotfixes that are needed today installed. Sometimes Microsoft replaces one hotfix with a more up-to-date hotfix. Remember to always have the same operating system version on your imported installation media as the captured image operating system version. MDT cannot deploy a captured image with i.e. Service pack 1 if the installation media is RTM.

In the policy you can choose whether to patch the capture machine or not. If you want to patch it you can choose to get the updates from Windows Update or from your own WSUS server (if you have one). If you enable updates, the capture machine will get patched during the installation and once the installation is completed all you need to do is to capture it.
When you have created the policies, you are good to go. Now you just need to pre-stage a computer to OU representing the Windows version you want to install. The OS install will take about 15 minutes and then WSUS will start patching the computer. Depending on how your WSUS policy is configured you might be able to start the install before you go home and by the next morning it will be fully patched and ready to be captured.
Note: Never login to the capture machine with a domain account, always login using local admin. Another very important thing to remember is to never uninstall or modify the AppX (Xbox, Bing etc.) applications in Windows 8 and 10 before you capture it, this will break the capture process. If you want to remove this applications, we suggest you do this while deploying the golden image to your corporate machines.
P.S. This guide shows you some of the ways you can maintain your up-to-date golden image. If your image contains other settings, you should automate these as well through group policies. This way you won’t forget manual setting before each capture process.
Good luck!
Last updated on May 9, 2025