This website uses cookies to ensure you get the best experience on our website. Learn more

Adobe Reader best practices with App Deploy
Table of Contents
A customer recently asked me: What is the best way to handle all of the numerous Adobe updates? After the initial install, updates may be required quite frequently. How do you manage it? I turned to my colleague Johan and sought his advice on the best practices.
If each update is handled separately in Specops Deploy / App, installing the next major version (for example going from Adobe Reader 11 to Adobe Reader DC) would require you to un-deploy each and every update. That would be cumbersome for desktop management.
So here at Specops, we recommend treating each update as a major update. This would keep everyone on the same version, and when a real major update is available, everything can be easily uninstalled.
To get started, extract the .MSI for Adobe Reader if you have not done so already. Put the .MSI file and data1.cab into your install directory. Download the Adobe Customization Wizard, and create a custom MST file. Make sure you:
- Turn off automatic updates
- Accept EULA
- Remove messages and notifications about upgrades
You will need to also create two scripts – Install.cmd and Uninstall.cmd. I will talk more about these two scripts below. In the install directory include the following:
- Adobe Reader MSI file
- cab file
- Adobe Reader MSP file for patching for that version
- Custom MST file
- cmd
- cmd
The Install.cmd script should contain:
msiexec /i AdbeRdr11000_en_US.msi /qn TRANSFORMS="1.mst"
msiexec /update AdbeRdrUpd11012.msp /qn
**The 1.mst is the name of your custom file.
The Uninstall.cmd script should contain:
MsiExec.exe /X{AC76BA86-7AD7-1033-7B44-AB0000000001} /qn
The GUID would be the name of the install – located in the registry HKLM\Software\Microsoft\Windows\CurrentVersion\Installer\Folders and look for your version of Adobe.
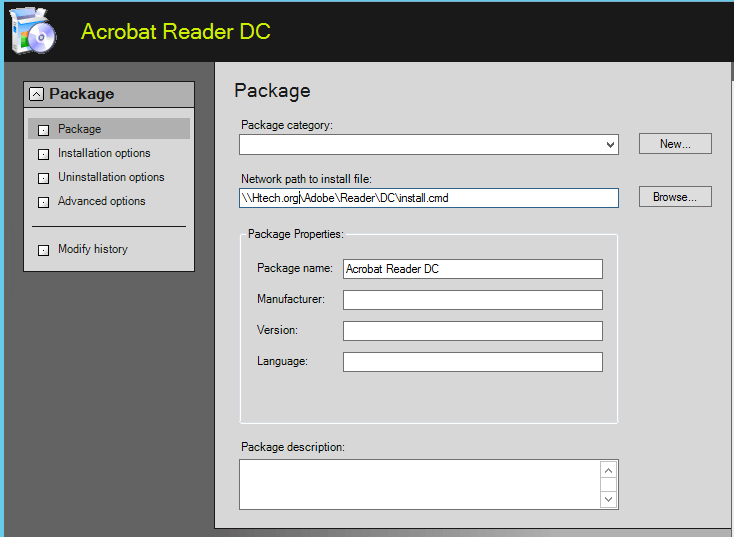
In Deploy/App – create a legacy package – with install.cmd as your install package and uninstall.cmd as the uninstall command. The command in the package should be point to the installation directory, for example %SpecopsDeployExecuteDir%\install.cmd or see the example below.
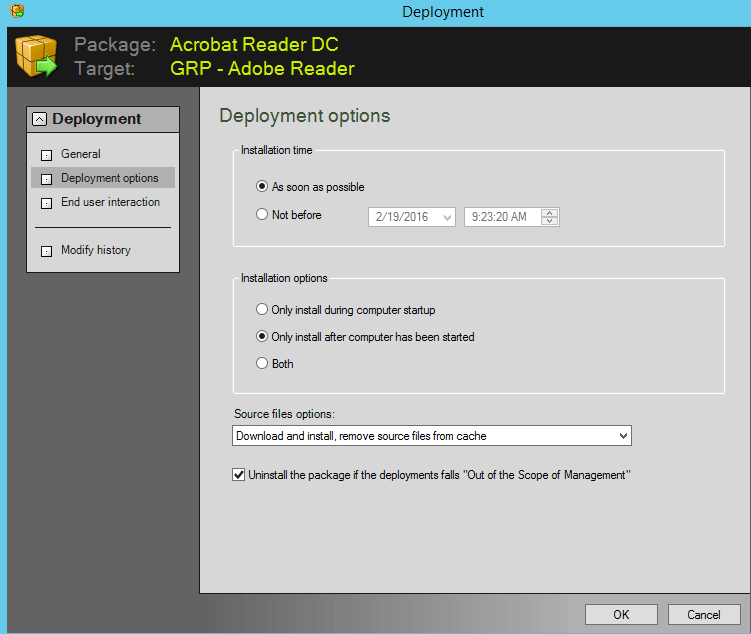
Also, make sure you tick Uninstall the package if the deployment falls “Out of Scope of Management” in the Deployment – this will remove the application if the computer is moved out of the target.
When you want to add new patches in the future– create a new package with the updated MSP file in it. You will need to upgrade and point to the new package.
This is the best way for desktop management of the numerous patches and will ease your next update to a major Adobe version.
Happy Deployments!
(Last updated on November 5, 2024)


