Web SDK is only available to customers who started using
Duo Security prior to the 8.15 release of
Specops Authentication. Customers who start using
Duo Security from 8.15 onwards must use Auth API (see below) to configure
Duo Security.
Pre-requisites: The Owner, Administrator, or Application Manager Administrative Roles are required in Duo Security.
- Log in to the Specops Authentication Web: https://login.specopssoft.com/authentication/admin
- Select Identity Services in the left sidebar navigation, then select Duo Security.
- Select Enable, then in the pop-up select Enable again. This will make the service available for use in Specops services.
-
Log into the
Duo Security Admin Panel.
- Select Applications in the left sidebar navigation, then select Protect an Application.
- The next page shows a list of the different types of services that can be integrated with Duo Security. In the list, find Web SDK and select Protect this application.
-
Set a policy for the application by using an existing one or creating a new one.
the New User Policy setting should be set to Require enrollment. Allow access without 2FA will allow users to bypass Duo Security without authenticating. Deny access will block users from authenticating with Duo Security.the Group Access Policy setting should be set to No action. As with the New User Policy, it cannot be set to Allow access without 2FA or Deny access.
- Configure the Settings and enter a name.
- Select Save.
-
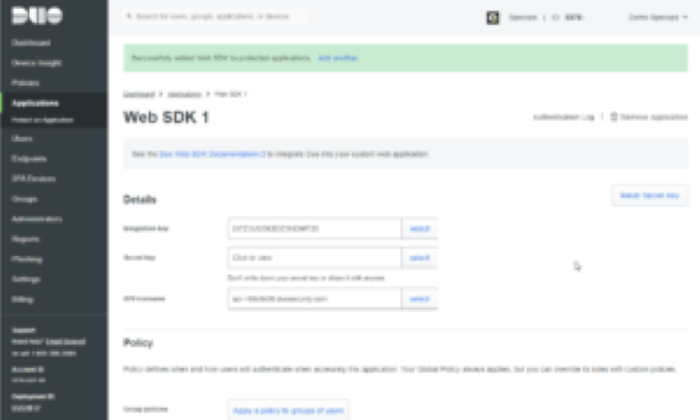
From the Details section, copy the Integration key, Secret key, and API hostname into their corresponding fields in the
Specops Authentication Client.
the Attribute name field can be left blank to use the default Active Directory attribute (sAMAccountName), unless you need to use a different AD attribute.
-
Select Test connection. If the connection was successful, a message saying Connection test successful will apear.

- Select Save.
To add Duo Security to your policy
-
Select
- Drag Duo Security from the Unselected Identity Services section to the Selected Identity Services section, and configure Weight, Required and Protected settings.
- Select Save.

